Thursday, April 26, 2012

Homemade Laundry Soap

     Well here it is ya'll! My recipe for homemade liquid laundry soap. I got the original recipe from the Duggar family but have through the years changed it up a little and it works great for us. I have been making this for about 6 years now and have saved us a small fortune by not buying laundry soap from the store.

     It will cost you around $4 for a box of borax and the same for the Super Washing Soda but one box will last you over a year. The bars of soap will vary from $ .50 to $1 each so that will be your big expense. Once you have it all together it will run you about $3 to make a batch!

     You need:


  • 1 (14 oz) bar of Zote brand soap. This is normally found in the laundry isle. There are two kinds, one bar is white and one bar is pink. (Naturally I use the pink because I am a girl and I love pink! lol) You can use Fels-Naptha bars but you need about 2 1/2 to equal the soap in one Zote bar. You can also use Ivory because it is pure soap, just realize you need about 14 oz of soap.


  • 3/4 cup of Borax. You can find this in the laundry isle too. I pour mine out of the box it comes in into an airtight container simply because it helps keep it from clumping up between rounds of making soap. Borax is used for so many things, the box has some great cleaning ideas too!


  • 3/4 cup of Arm & Hammer Super Washing Soda. This can be hard to find but I have noticed more places carrying it because alot more of us are making laundry soap at home now! Look in your laundry isle at the grocery stores or even at the hardware store. You can get it online it will just cost to get it shipped.


  • 1 clean 5 gallon bucket with tight lid

  • Hot Water


       The first thing you will need to do is grate your soap. I have an old cheese grater I keep in the laundry room just for this purpose. Depending on what soap you use, when you grate it could look like grated cheddar cheese or like Parmesan cheese, just depends on how hard or soft your soap is. Either way grate all the soap into at large saucepan. On a side note, do not try to save time by using a food processor. It will end badly for the appliance and no, I will not be saying where I got this info from!


    To your soap you will want to add 6 CUPS OF HOT WATER and set aside for about 15 minutes. I found out quite by accident if I let the soap sit in the water and soften up, it melts so much better! Be sure to give it a stir when you add the water so it all get wet.


    Next you will place the soap on the stove and slowly melt the soap. It will become clearer as it melts. Be sure you do this step slowly, stirring often. You want to get any big lumps of soap melted down. This is what it looks like before you start melting.


And this is after!


   Take the 3/4 CUP EACH OF BORAX AND ARM & HAMMER SUPER WASHING SODA and add it to the melted soap. Continue to heat until powders are dissolved and you have broken up any clumps of powder. It will resemble thin honey at this point.
  

   Fill your clean 5 gallon bucket about 1/2 way with HOT WATER. Pour the soap mixture into the water and stir. Add more hot water to the bucket to get to about 2 or 3 inches from the top of the bucket.


   Place a tight lid on your bucket of laundry soap and let it sit over night. In the morning you will find that you have this.....


   The soap will be in kind of a gel like state with liquid around it and you will need to mix it up to break up the huge gel mass. This is where having a paint auger comes in so very handy! I used to use a yardstick to help me mix it or my hands but that is icky feeling and kinda mess! I bought this paint stirrer at the local hardware store for about $5. It fits on my drill and works like a charm to mix the soap all up. AND everyone knows it is the soap mixer and therefore falls under the "that's Mom's don't touch it" rule so it is always ready when I need it! LOL


Get yourself a container and add 2 parts soap and 1 part water. You can do 1/2 and 1/2 but I like this mixture best. I have found the spout type of containers don't do that great if you have any lumps in the soap so I just hung onto an old color safe bleach bottle and refill it as needed. Also, if you don't do laundry everyday you will need to give the bottle a good shake before you use it just to mix the soap and water up a little again.


Let me know if you make some! If I live close enough to ya, I'll be more than happy to come over and help you make a batch! If not, well......message me if you need me!

Sunday, April 1, 2012

Sandy's Super Simple Super!

Hoss and I were childless today, (whoo hoo!!) and eventually we grew hungry. It happens. After searching the cabinets I decided to use a little of this and a little of that and came up with this yummy super for us! You can add whatever veggie you want, decrease the pasta even. Make it your own!

Here's what I used:

butter, margarine (whatever you have. I was cookin' with butter long before Paula Dean made it so darn popular!)
1 large onion, cut in half then sliced thin
2 small yellow squash, sliced thin (you can use zucchini if you want)
1 can of petite diced tomatoes with sweet onions, DO NOT DRAIN!! (any tomatoes will do)
1/2 lb of leftover grilled smoked sausage, sliced thin
garlic to taste ( I use chopped garlic from the produce section but powder works well too)
a healthy sprinkle of Nature's Seasoning (see picture at bottom if you have no clue what this is)
1 box bow tie pasta

Make bow tie pasta by box directions and have it going while you work on the rest!
In a large skillet, saute your onions, squash & garlic. Add a sprinkle of the Nature Seasoning at this point. Add your smoked sausage to the veggies, then add the canned tomatoes. Simmer until warmed through. Drain your pasta then add it to the sausage/veggie mix. Mix well and enjoy! Top with some Parmesan cheese if you so desire!


                           Lets just call this beauty, Sandy's Super Simple Super!!


Morton's Nature's Seasoning, good stuff!

Thursday, March 8, 2012

Chicken Pot Pie in a Biscuit

So the original name for these is Chicken Pot Pie Cupcakes but I really don't like that name because when I think of cupcakes, I think of sweet! So I have decided to call them.....


Chicken Pot Pie in a Biscuit


What you need is as follows;

1 large can of cooked chicken breast ( I used the about 15 oz can), drained
1 can (15oz)  mixed veggies, drained
1 can cream of chicken
1 cup shredded cheddar cheese
2 cans large Grands-style biscuits (8 count cans)
Garlic powder, salt and pepper to taste.

Heat your oven to 350. Spray 2 regular sized muffin tins with non-stick spray. In each muffin hole ( is that the correct term? Cavity perhaps? Heck I don't know, nothing sounds right but you get the idea! lol)  take one of the biscuits and stretch it out a little so it cover the bottom and the side of the hole, leaving the center open for filling. (Sorry no step by step pics, forgot to do that!)
In a bowl, mix together the chicken, the veggies, the cream of chicken and the cheese. Blend well and the add the garlic, and salt and pepper to taste. Remember that its all cooked so sampling it to see if it needs more spices is ok!
Spoon filling into biscuits and be sure to really stuff them good! You may have some filling left over but that's ok, you can freeze it for a later use.
Bake about 15 to 20 minutes or until golden brown and enjoy!


You could also sub some cooked ground beef for the chicken and a cream of mushroom to make beef pies, or use shredded bbq chicken/or pork to make bbq pot pies, OR meatballs and marinara sauce for a meatball version! The possibilities are endless!

Saturday, February 4, 2012

Memory Board 101

           I just love memory boards. They are such a great way to show off your memories of favorite places or people without taking up alot of room. I made my 1st one just a few months ago for my Grandma to have in her nursing home room and she just loved it! I have made many more since then and keep getting asked how to do it so I figured it was time to show the world just how easy they are to make!


           Here's what you need to get started:

  • Quilt Batting, you can get in a package like this at Walmart or you can go to a fabric store and buy it by the yard. This is a Poly-Blend but you can use any kind of batting you'd like.
  • 1 stretched artists canvas in what ever size you'd like. I find a 16x20 makes a great sized board and you can find these at Walmart or if you are near a Michael's, they run them on sale alot for 40% to 50% off.
  • Staple Gun and staples. I highly recommend you get one like the one pictured, The Easy Shot! They are fabulous! Your hand doesn't feel like its going to break after a few staples with this type gun. Check your local hardware store.
  • Fabric of your choice, however much you need to cover the canvas. I use about 2 inches more on all 4 sides than the size canvas I am using. (ex. 16x20 canvas = 18x22 piece of fabric)
  • Ribbon to go with your fabric and some buttons as well.
  • Not pictured are some hem tape, Heat-n-Bond iron on adhesive ( 5/8 to 3/4 inch size, ultrahold strength is best) and 3/4 white ribbon.

The first thing you want to do is cut your fabric to the size you need. Remember at least 2 inches extra on each side.


Lay your fabric wrong side up on your work surface and add batting on top. Take your canvas and place it upside down on the batting.


Now comes the fun part, STAPLING!!! (Yeah, I need to get more, I know.)  Making sure you have your canvas centered on your fabric/batting, take your staple gun and staple the center of one side, pulling the fabric tight.


Be sure to staple once in the center of the 1st side then turn and staple the opposite side, then repeat with the remaining sides. You should have 1 staple in the middle of each side at this point. You need to start this way to make sure you get the fabric stretched across the canvas good and tight.

From here you start on one side and staple the fabric down along the edges to about 1/2 inch or so from the corners. Take a small hammer and tap the staples in when you finish each side. Remember to work opposite sides!


This is how your board should look at this point in the process:


The corners are pretty easy to do once you get the knack. 1st you straighten out one side of the corner like the picture below:


Next you fold the corner downward towards the other side. Then lay it back over and staple it flat. Add extra staples if you need, be sure to hammer them too!


Once you have all 4 corners done, trim away the extra fabric.


Your memory board should look like this:


Now you will take you coordinating ribbon and stretch it out across the front of your board at an angle, leaving a little over hang on the loose end of the ribbon. Flip the board back over and staple one corner down.


Repeat this step again to form a an X on the front of the board.


Continue on with your ribbon until your board looks like mine!


Now we will move on to how I finish the back. You don't have to do this step but I didn't like the way the back looked with all those staples so I figured this easy way to dress it up! Take your white (or whatever color, really doesn't matter) ribbon that is about 1"inch wide and your hem tape (HeatnBond) and cut both to fit one side of your memory board.

Place the hem tape on the board and lay the ribbon on top so it covers the iron-on adhesive. Using a hot iron, gently press down on one end of the ribbon for about 5 to 10 seconds, move down the length of the ribbon. This will fuse the ribbon to the rough edge of the fabric and the wood on the back of the board. Do remaining 3 sides and you will have a nice clean looking back to your board!


At this point you can sew on some buttons if you'd like or you can glue them on. I sew mine on because it gives the board a quilted look. You do not have to even put buttons on it if you don't want to, just a personal preference of mine!
Well there  you have it folks, really neat memory boards that take no time to make! Finished product looks great, I think!


Friday, February 3, 2012

How I Made A Magnetic Make-up Board!

    I saw this idea and thought once again, "Hey I can do that!"....so I did. What I did not do was my nails before I started taking these picture! Ignore the half worn off polish okay? LOL!

    That being said, here is a step by step guide to making this magnetic makeup board. You can make it however big or small you need. (I used 10x13 frames.)

Things you will need to complete this little project:
  • Old picture frame, spray painted whatever color you'd like
  • Piece of metal cut to fit inside of frame. I used galvanized flashing my father in law had laying around but you can get some at a local hardware store. You can use any metal that magnets will stick to.
  • Spray adhesive
  • Piece of fabric to cover the metal. I use fat quarters from Walmart ($.97/each.) They are cheap and you can find all kinds of pretty stuff!
  • Small button sized magnets (craft section at Walmart)
  • Hot glue gun and glue
  • Makeup
  • Small container for makeup brushes and eyeliners and such. I lucked out and found the ones I used at the Dollar Tree. They come in red, blue, green and purple and they are in the school supplies isle as magnetic pencil cups! You can make your own out of large pill bottles from the pharmacy painted to match.


Here is a picture of everything I used


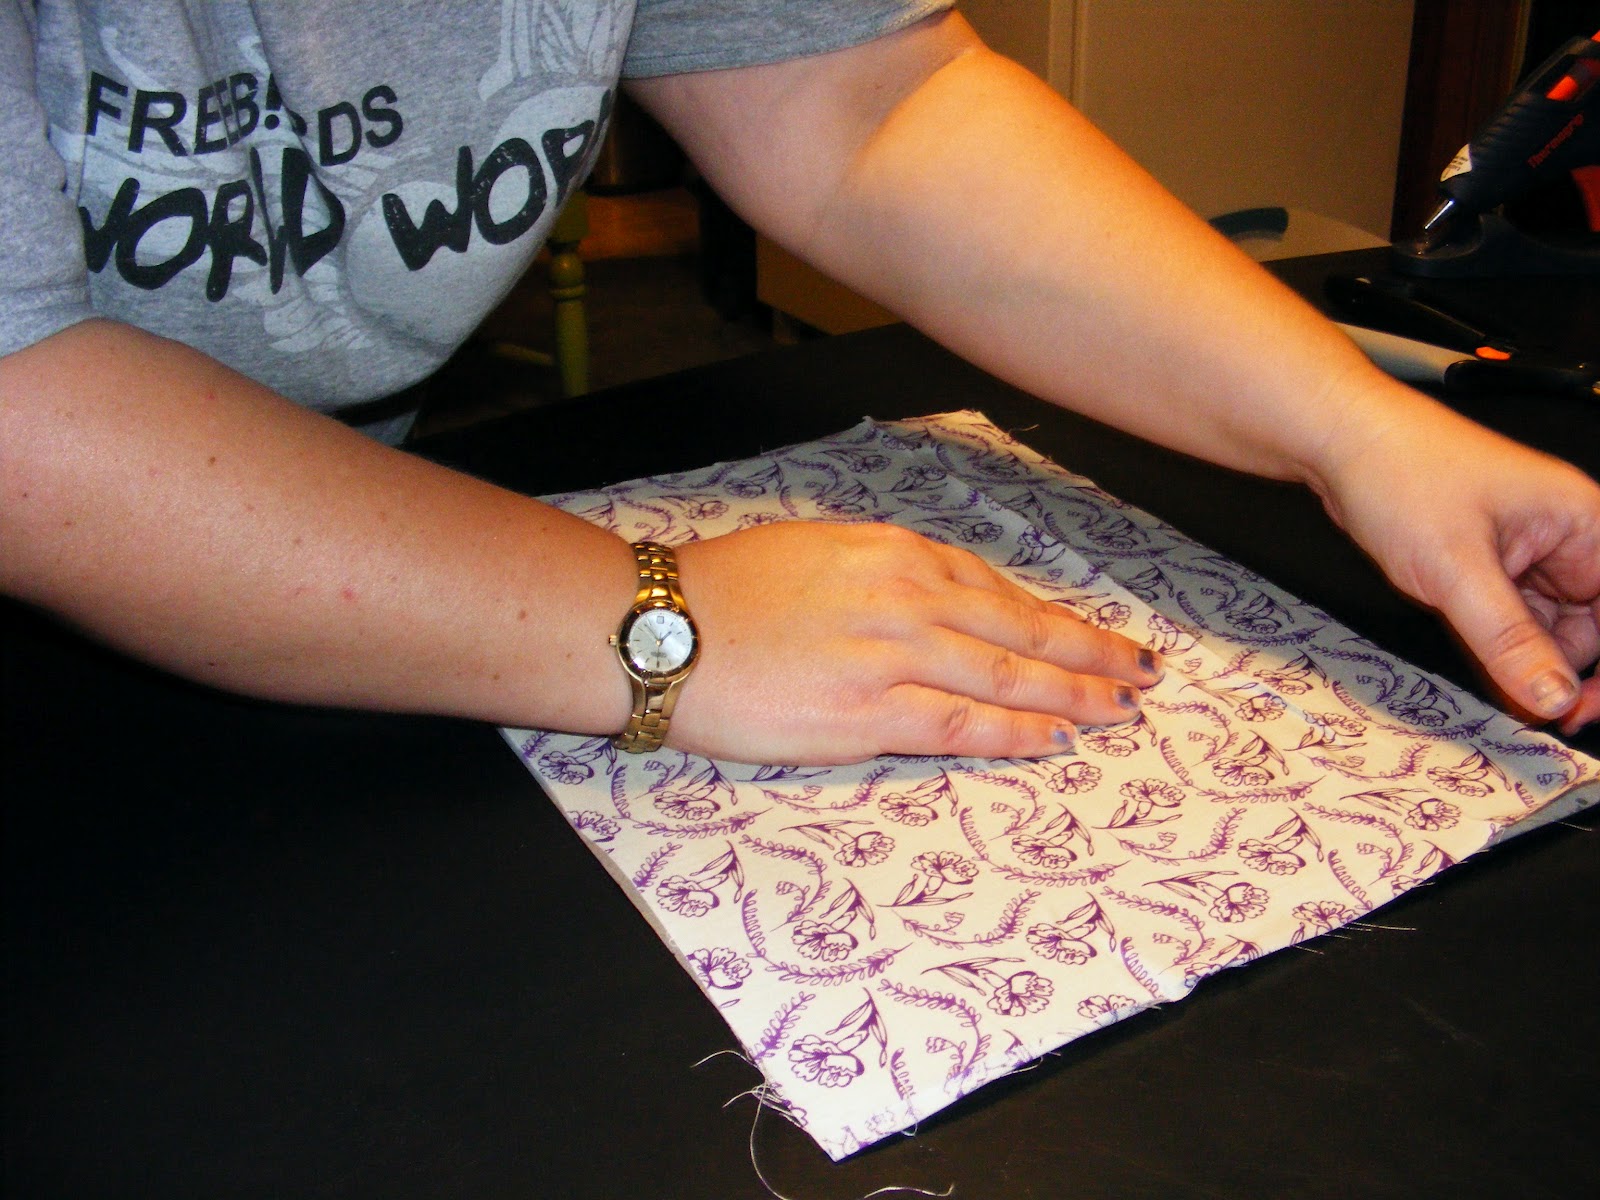
So the first thing you want to do is cut your fabric to be slightly larger than the metal.


Next, spray your metal with the adhesive. Be careful when spraying because this stuff will go everywhere!


Quickly stretch your fabric over the sprayed metal and smooth out all the wrinkles and bubbles. You have a few minutes with the brand of spray I used but too much lifting and repositioning will make you have to start over with the spray.


You are ready to put your fabric covered metal into your painted frame at this point. Be sure to trim any extra fabric off for a nice clean look on the back. You can take clear caulk and run around the back of the frame for some added stability if you want but if you frame has lots of tabs to hold it you will be fine.


Gather your makeup, some button magnets, and a hot glue gun for this next step. On the back of your makeup, hot glue 1 magnet for the small ones and 2 for larger compacts. Hot glue is great because once the makeup is used up, you just pop the magnet off and glue it on your new container!


I ran into one issue with one of the girls eye shadows. The container was not solid on the back so I had to fill in the gap so the magnet would reach the board. I used old buttons I and glued them in the hole 1st, then added the magnet. You can always just double stack the magnets if you need to. I have 4 of these to make so I was trying to conserve my magnets!


It is at this point I would like say that I think after Caller Id, the cordless glue gun is the best invention of all time! Okay well maybe not of all time but certainly to a crafty person like myself! I highly recommend you invest in one!


I add some extra magnet strips to my container just for a some security. If you make your own, obvious you will want to. You can get magnet strips at Walmart in the craft section too.


And there you have it, a pretty magnetic makeup board of your very own! This one is my youngest daughters, the bottom one belongs to my 2nd to oldest girl!